

How To Install Cab File Windows 10
On Windows 10, you can install the .cab file using the Deployment Image Servicing and Management (DISM) command-line tool available in the Command Prompt, and hither's how.
The .cab file extension refers to the local archive file format, providing an efficient way to package and compress multiple files in a file library.
Developers frequently use CAB files to build awarding installers and Microsoft, for example, sometimes uses this format to distribute stand-alone updates to Windows 10, also every bit other packages.
If you happen to have a Windows 10 update in CAB format, you lot can use the DISM control line tool to quickly install packages on your device.
In this tutorial, you lot volition learn the steps to install a CAB file on Windows ten.
Install the CAB file with the DISM control
To install the .cab file using Command Prompt, follow these steps:
Pace 1. Open Start on Windows x.
Pace ii. Search for Command Prompt , correct-click on the top result and select the option Run as administrator .
Stride iii. Type the following control to install the CAB file and printing Enter :
dism /Online /Add-Package /PackagePath:"PATHTOCAB" For example, the following command installs update KB4562830 on Windows ten:
dism /Online /Add-Packet /PackagePath:"C:UsersusernameDownloadswindows10.0-kb4562830.cab" 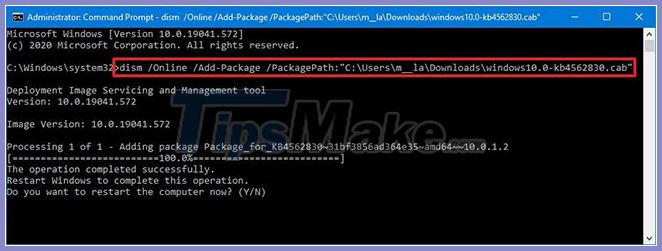
Later on yous complete the steps, the packet will exist installed on your estimator. If this is an update, you lot may also need to restart your computer to complete the installation.
Extract the CAB file on Windows 10
Although you may have received a .cab file, that doesn't mean you have to install it. Some developers may just use this format as a compressed folder to deliver specific content.
To unzip the .cab file, follow these steps:
Pace ane. Open up File Explorer.
Stride 2. Browse to the folder with the file chiffonier.
Step 3. Double-click the .cab file.
Step 4. Select all contents ( Ctrl + A ).
Step 5. Right-click on the choice and select the Extract pick .
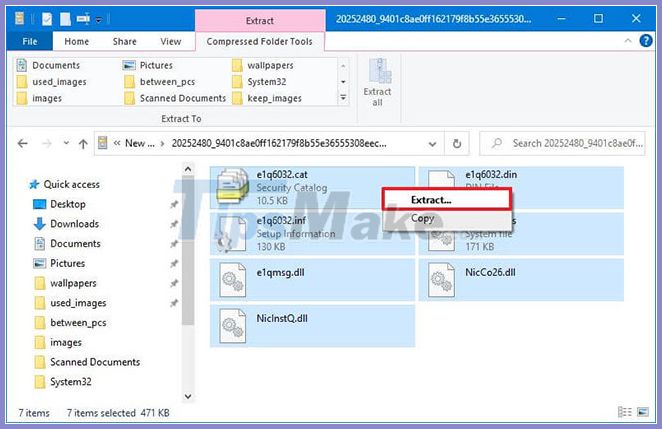
Step 6. Select a destination folder to extract the file.
Footstep vii. Click the Excerpt button .
After completing the steps above, you tin use the files to install applications, drivers or updates on your estimator.
Install the CAB file to update the driver
In instance you are installing the driver and the package cannot exist installed using the DISM tool, you can excerpt the contents of the CAB file to install the commuter manually.
To update the driver using the .cab file on Windows 10, follow these steps:
Pace ane. Open File Explorer.
Step 2. Navigate to the binder containing the file.
Step 3. Double-click the CAB file to open it.
Footstep 4. Select all contents ( Ctrl + A ).
Footstep 5. Right-click on the choice and select the Extract option .
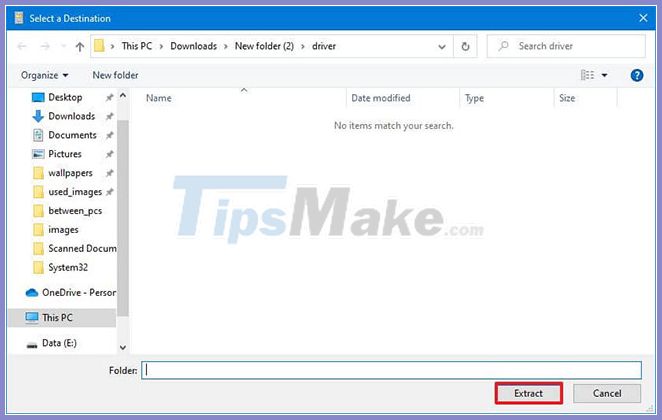
Step half dozen. Select a destination binder to excerpt the file.
Step 7. Click the Extract button .
Footstep eight. Open Start.
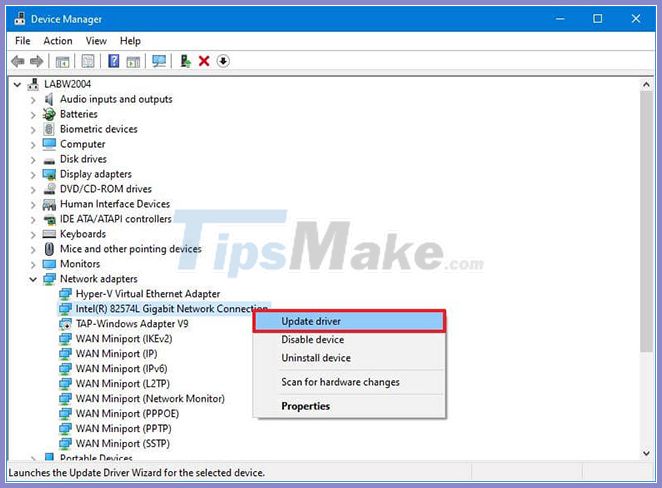
Step nine. Search for Device Manager and select the first consequence.
Pace 10. Correct-click on the device driver to update and select the option Update driver .
Stride 11. Click the Browse my computer for drivers choice .

Footstep 12. Click the Browse button .
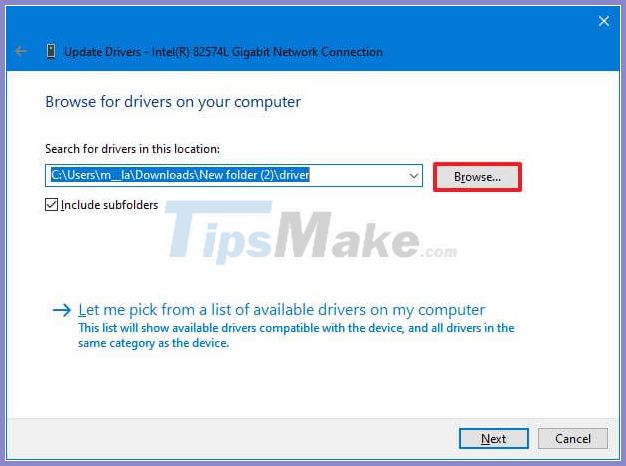
Step 13. Select the folder where the files are extracted from the CAB file.
Pace fourteen. Click the OK button .
Stride 15. Click the Next button .
Footstep xvi. Click the Close button .
After you complete the steps, Device Manager volition detect and install the commuter components for device setup.

How To Install Cab File Windows 10,
Source: https://tipsmake.com/how-to-install-cab-files-for-updates-and-drivers-on-windows-10
Posted by: meurerfiefultoothe.blogspot.com
0 Response to "How To Install Cab File Windows 10"
Post a Comment